Windows 10 has created a new way of installing features that aren’t included in the operating system image by default known as “Features on Demand v2”. This makes the operating system smaller for those that don’t need all these extra features. When an app/program requires such feature (in this case .NET Framework 3.5), but doesn’t find that version enabled on your computer, it displays the prompt for installing the .NET Framework 3.5 on demand, either during installation, or when you run the app for the first time after its installation. In this prompt, you can choose the option Install this feature in the Turn Windows features on or off utility to download it over the internet and install and enable the .NET Framework 3.5 on the computer.
If you are on a computer that is not connected to internet, or you have limited bandwidth, you may find difficulties installing it that way. Even if you have don’t have the above problems, you may face the one I and man other users faced while installing .NET Framework 3.5. No matter how many times I tried, whenever I tried to install .NET 3.5, I got the following message every time:
The following feature couldn’t be installed:
.NET Framework 3.5 (includes .NET 2.0 and 3.0)
Error code: 0x800F081F
I even tried with a standalone package as well as through Windows Features.
Fortunately enough, there is a workaround for this as .NET Framework installation packages are included in Windows 8 and 10 installation media and you can use those to install .NET 3.5 on your system offline and easily.
Install .NET Framework 3.5 in Windows 10 offline
To start, you need a installation media of Windows 10. It can be the ISO you downloaded, a DVD, a USB, whatever you have.
- Insert your Windows 10 DVD or USB, or double click on it’s ISO file to mount it.
- Open This PC and note what drive letter of the Windows 10 installation media.
- Now, open Command Prompt as Admin. (To do so, press Win+X and click on Command Prompt (Admin)).
- Now just type in the following command:
Dism /online /enable-feature /featurename:NetFX3 /All /Source:Y:sourcessxs /LimitAccessBe sure to replace the Y with the drive letter of your Installation media. - Now just hit Enter and wait for the installation process to finish. Typically, the process will take a couple of minutes.
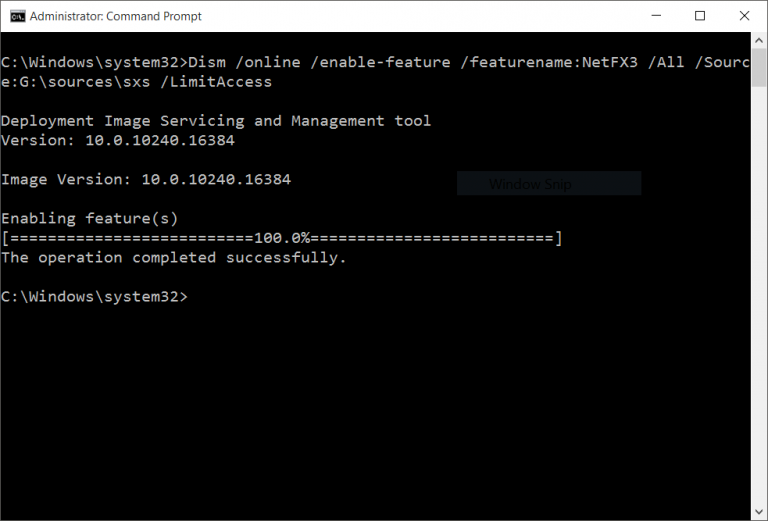
Here are the details of the command line parameters of the command given above:
/Online targets the current running operating system.
/Enable-Feature /FeatureName:NetFx3 specifies that .NET Framework 3.5 is to be installed/enabled.
/All enables all the parent features of the .NET Framework 3.5.
/LimitAccess prevents DISM from contacting Windows Update.
/Source specifies the location of the files needed.
Hope this helps and resolves your issue easily. This post is for Windows 10 but the same should also work for Windows 8, 8.1, (and even 7 perhaps).