How to setup printer to open cash drawer automatically?
Your cash drawer can be configured to automatically open when you print a receipt for each transaction. Here are the steps you can take to configure your cash drawer.
- Plug in the RJ12 connector cable (which looks similar to a phone line) from the cash drawer into your the receipt printer.
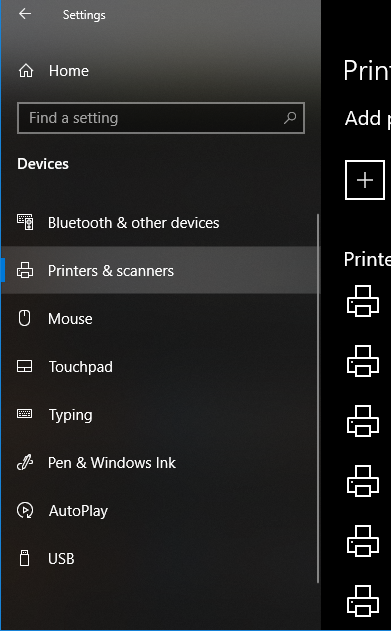
- Next, go to the Settings menu in Windows 10, select Devices and select Printers & Scanners on the left-hand menu.
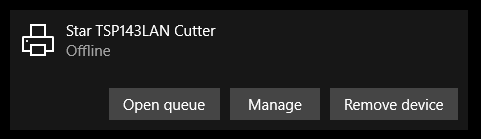
3. Select the printer you’d like to configure, and click on the Manage button.
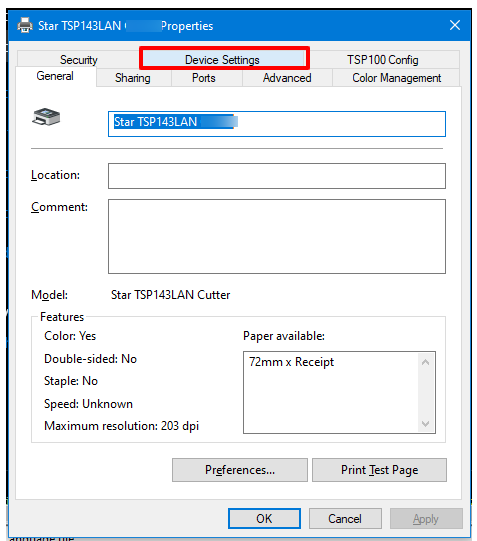
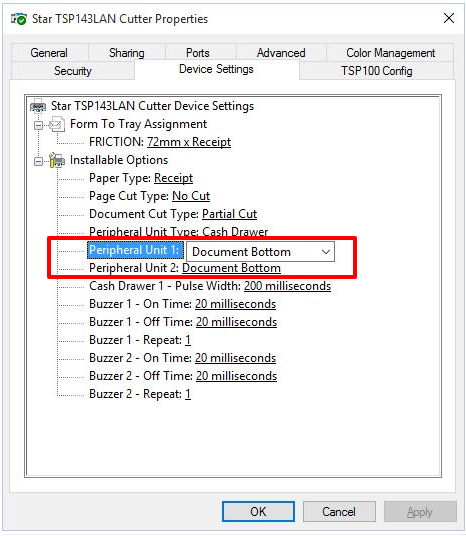
4. Next, click on the Printer Properties link and a window will open. From here, select the Device Settings tab.
5. Under Installable Options, find the Peripheral Unit Type and change it to ‘Cash Drawer’.
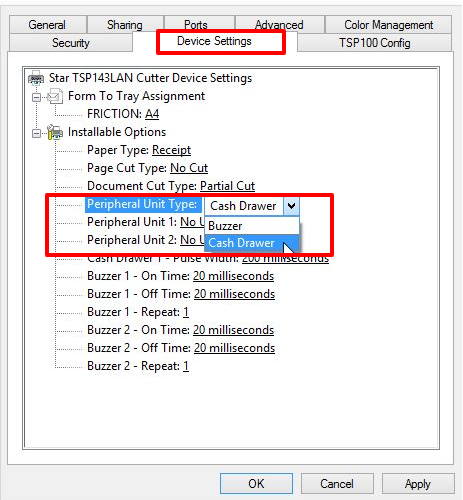
6. Change the Peripheral Unit 1 and Peripheral Unit 2 fields to ‘Document Bottom’ to have the drawer open after the receipt starts printing.
If you want the cash drawer to trigger before the receipt prints, select ‘Document Top’ in Peripheral Unit 1 and 2
- Click OK to save these settings and perform a test sale to see if it’s been configured properly
- You can also set a shortcut key on your keyboard to open the cash register.
